I sold my two steel 100 CuFt high pressure tanks to a nice guy who works on campus. He seemed very happy to get them and I am happy that the tanks went to someone who will enjoy them. Hopefully in the fall I’ll get a chance to dive with him.
Casting SCUBA lead
Rather than paying the ridiculous prices many dive shops want for SCUBA lead, I decided to make my own. Yes, casting your own lead is rather dangerous. Hence why you should do it in a well-ventilated area while wearing proper barriers and respirators. In short, don’t breathe the stuff and don’t get it on you. Wash all of your clothes or even throw them away after being in contact with lead or lead fumes. FOLLOWING ANYTHING I TALK ABOUT ON HERE IS AT YOUR OWN RISK. I take no responsibility for anything you might do to hurt yourself or others. If you don’t know what you’re doing, don’t do it. Spend the money on some pre-made SCUBA lead!
The first and probably hardest part of the whole operation is acquiring cheap lead to melt. I found mine through a friend who happened to have a 100 pound chunk of lead used in ocean anchors and ship ballasts. In other words, it was already alloyed correctly to prevent the lead corroding into lead chloride when it comes in contact with salt water.
Originally I had tried to saw the large brick of lead into smaller chunks to use directly as my weight system. That plan didn’t work so well. A little over two hours after I started hacksawing away at the block, I finished my first chunk. Yeah, that wasn’t going to work very well. Plan B was to melt and cast the lead.
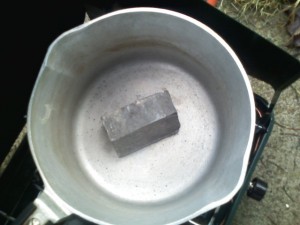
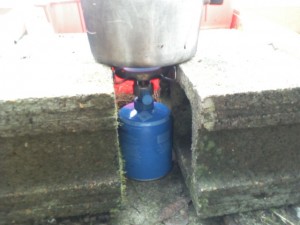
My first attempt at melting used my roommate’s two burner Coleman stove. After about an hour of heating, it still hadn’t quite melted. The lead was definitely soft but it wasn’t liquid. I pulled out my trusty Camping Gaz stove and fired it up. A few minutes later I had a happy pot of melted lead.
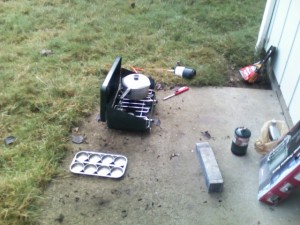
Before I go any further I should make a note of the types of pots and molds I am using. Rather than buy some fancy crucible and molds, I went to a local thrift shop. For a couple of bucks, I picked up an old cast aluminum pot with lid and a cast aluminum muffin tin. Aluminum’s melting point is about double that of lead making it perfect for the application. Cast iron, stainless steel, and other such materials can be used. However, be careful of pots that have coatings. They’ll probably burn off and could screw up your lead. Remember: anything that you use to melt and cast lead with is no longer safe to be used in the kitchen!
Since casting my first batch of SCUBA weights, I’ve learned that some people cast small weights in the bottom of pop cans. The cans don’t melt and make beautiful forms. They are especially good for making lead weights for bottom fishing as well.
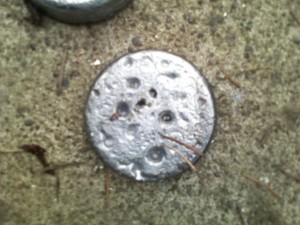
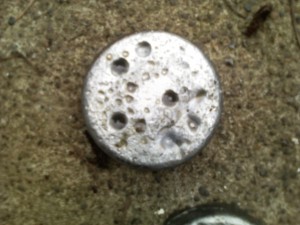
The first pour turned out quite nice. Before I dumped the lead into my muffin tin, I coated the inside with some old motor oil I had laying around. No clue if it was necessary or not but it did seem like they came out very easily.
In a fit of pure madness, I decided that it was time to step up efforts and attempt to melt the rest of the 100 pound block of lead… all at once. In hindsight, I should have taken the time to split it into several 15 or 20 pound chunks. Not only is it very hard to pour out of a pot when it contains 100 pounds of lead, it is also very difficult to actually make that lead melt.
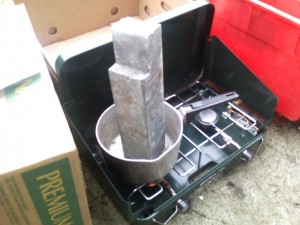
The Coleman stove was employed to try to heat the lead to near melting before I was to switch to the Camping Gaz stove. This is another important point. Always ALWAYS make sure you have enough fuel before you start heating lead. There is nothing worse than almost being to the melting point and running out of gas. My Camping Gaz canister was running in that direction. After waiting for the lead block to melt for several hours, I decided that I should just switch to the other stove.
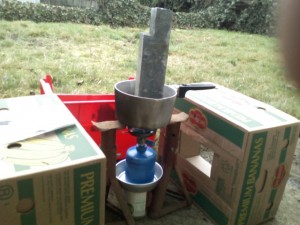
At first, I tried to support the whole mess with car jack stands. That didn’t go so well. When the block started to melt, it tipped and dumped the whole thing on the ground. Oops. I finally found some cinder blocks that I could rest the pot on.
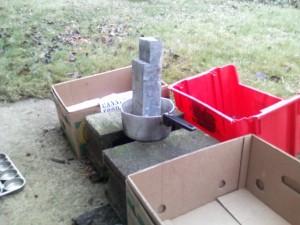
Another hour of heating passed and it still hadn’t quite melted enough to pour. That hour of heating also used up the last of the gas cylinder. No where was open in town that sold the canisters for my Camping Gaz stove. I was forced to switch back to the Coleman.
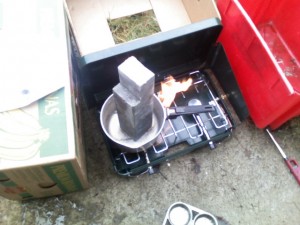
At this point, brilliance struck. I grabbed a roll of tin foil and started insulating the heck out of the pot and lead block. Many layers later, it looked like a little silver mountain. That did the trick. Even on the Coleman stove, I managed to get about half the block of lead to melt down enough to pour. The trick, you see, is to hold as much heat in the pot and in the lead as possible. Without a cover and with so much mass sticking up into the cold air, most of the heat was escaping to the environment.
While the aluminum foil setup worked well, one problem remained. My lead block only half-melted. Rather than being pure lead, this block was a lead-tin-??? alloy. The lead melted out just fine but chunks of other material were left behind. I poured the lead and left the remnants in the pot. It was late, I was tired, and I needed to dive the lead the next day. In the near future, I will be re-melting the lead I cast and combining it with the left-overs from before to make sure I have consistent, high-quality SCUBA lead that does not need treatment.
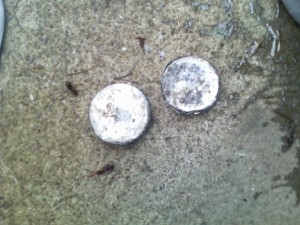
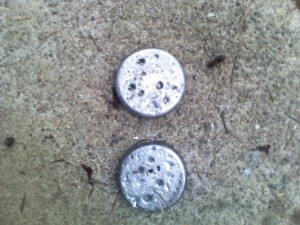
All in all, I would say that my lead casting experiment was a success. The muffin tin produced perfect little 3-4 pound weights with no sharp edges that slip nicely into my BCD weight pouches and my weight belt. After about 30 dives on the lead, it still looks in good shape and hasn’t corroded. It should stand up even better to harsh marine environments once I recast with the left-over lead.
A weekend full of adventure
Early last week I decided that I needed to go SCUBA diving. Originally, I was scheduled to go out and do some research dive training in Washington. That fell through at the last minute. Instead I ended up riding in a 1978 VW Bus to Central Oregon for some unexpected boat diving on Lake Billy Chinook.
Alina, one of the Divemaster Candidates in the recreational SCUBA program I’m involved with, needed two more dives to start working on the pool deck. The obvious solution to my diving dilemma was to jump in her VW and take off for some diving. We piled all of my gear in the back of her bus and took off for Eugene to pick up some rental gear for her.
Dive gear acquired, we looked at each other and realized that we didn’t really know where we were going to jump in the water. The tide had already been missed by an hour. We settled the debate by heading for Traibridge Reservoir up the McKenzie River Highway.
Winding our way up the mountain road we encountered deeper and deeper drifts of snow piled along the shoulder. Red cinder gravel was strewn about, obscuring the yellow and white lines. Oncoming traffic would periodically blind us with their brights. People were too scared of skidding off the road to remove their hands from the wheel. The sun had set earlier along the road while we sat in a traffic jam caused by a rollover accident.
The road down to Trailbridge is harrowing even in the best of summer conditions. A sheen of hardpack ice and loose cinder gravel made it downright exciting to get down to the bridge and power house. Four feet of snow blanketed everything promising Trailbridge to be a chilly dive.
Normally, I dive in the river channel next to the highway at the reservoir. It’s a good site with a lot of stuff to see. However, due to snowplowing, the parking lot was completely inaccessible. Had we parked on the road and hiked down, we would have had a 1000 foot scramble down the snow and through the trees to hit the water. During the day and with crampons, it might have been doable but in the dark and with full SCUBA gear on we decided against it.
Gunning the bus for all it was worth, we made it back up the incline and onto the highway. Our backup dive site was Clear Lake, another twenty minutes up the road. The few cars out on the road had a bad tendency of blinding us as they drove past. Our windshield was filmed over with whatever the highway department uses to deice the roads.
To make a long story short, we somehow missed Clear Lake all together. In retrospect, the driveway was probably not plowed out yet and the lodge was most likely shuttered. Five foot tall walls of snow lining the road will do that.
In a fit of pure insane genius, rather than turning around and heading down to lower elevation lakes or back to Corvallis, we instead drove toward Bend. Alina’s mother has a second home north of Bend near Lake Billy Chinook. A brief phone call later to confirm her mom was at the lake, and we were celebrating not having to sleep in an old VW bus in 15 degree weather.
We were greeted in the driveway by her mom driving a tricked-out Polaris ATV. She yelled at us to jump on the back with the case of beer we had bought in Redmond. Hanging on to whatever we could, the ATV tore off down the gravel road to a neighbor’s house.
At the neighbor’s house, we hung out a bit, chatted, and had a couple of beers. Alina’s mom’s boyfriend then offered to let us ride the ATV. Off into the night we went on a grand little adventure along the canyon rim.
The next morning we loaded our dive gear onto a 22 foot pontoon party boat. Down on the water, we hung on as we took the boat up toward 35 miles per hour. For a pontoon boat, it goes fast!
Up the Deschutes branch of the lake, we donned our gear and dropped down into the water. The hardest part of finding a good place to dive was finding somewhere that wasn’t too deep. The lake rests in a deep canyon and hits depths of up to 400 feet quite often.
The water was cold — 38 degrees at the bottom. We saw a few crawdads and one or two fish. On our second dive, I also found a small blue tarp. At Alina’s insistence, I did not open it up. Sometimes it’s best to let dead bodies rest.
Later in the day after we had retrailered the boat and and loaded our dive gear back in the bus, we headed west. Up and over the mountain pass and down toward Salem we drove. Just as we got onto the interstate a bit south of Salem, the bus started making a funny noise.
At Albany, we started smelling a funny burning oil odor. The bus began to loose power. Floored we could only manage 50 MPH. The red warning light for low oil came on. The exit for Corvallis appeared. We barely managed to limp into a gas station parking lot.
The back of the bus was smoking pretty badly. Oil dripped out onto the ground from the engine compartment. We went inside the convenience store to get out of the cold and let the engine cool.
A quart of oil and some cold air allowed us to restart the bus and get another 15 miles before it had another fit. The red oil light burned brightly as we lost all power. We coasted into a convenience store parking lot less than a half mile from Corvallis. The bus had finally had it. A tow truck was called.
Brent met us at Independent Auto Werks, the de facto old VW car repair shop in Corvallis. All of our SCUBA gear barely managed to squeeze into his car. It seemed a fitting end for a rather unexpectedly adventurous weekend.
